Garden Center Links

Installing a Patio
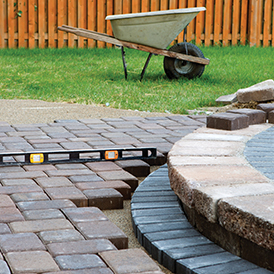
A do-it-yourself patio installation can be challenging, but is easily within the average homeowner's skill set. The results are extremely satisfying, allowing you to add a personalized touch to your outdoor space. Here are the basic steps to building a sand-based, non-mortared patio using pavers. Illustrated instructions and supply guides are available at your local Fleet Farm. Your store's associates would be delighted to assist you in determining the amount of material you will need for the type of patio you want to construct, as well as provide helpful hints and advice.
Before beginning any project, be sure to call Digger's Hotline, the Common Ground Alliance at 811 to have all utilities marked. Always wear eye protection while using power tools and use according to instructions. Remember, safety comes first!
Required tools and supplies:
- Gloves
- Tape measure
- String line for marking
- Shovel
- Trowel
- Stakes
- Paver base (or an equivalent to 3/4 inch minus (with fines) aggregate). Note: 3/4 inch minus aggregate is small crushed rock with fines, which compresses tightly for a firm base. Very small aggregate is referred to as "fines".
- Plate compactor Note: see your local equipment rental establishment. You can usually rent these by the hour, day, week or month
- Two 1-inch outside diameter metal pipes
- 2x4 board
- Paver sand
- Edge restraints (essential to prevent pavers from shifting)
- Circular or tub saw
- Diamond blade for cutting concrete pavers
- Safety glasses
- Carpenter's level
Installing a patio using pavers:
- Choose your location. Call 811 before digging. First, determine the pattern you want to use for positioning your pavers. You may want to draw a detailed plan to scale using graph paper. This will save time once you get to Step 4.
- Stake out size of project. Define the area with a tape measure, and mark it with string line and stakes. Dig around at least 6 inches beyond the desired finished area on all sides of the string. Excavate 7 inches deep for areas with well-draining soil and up to 9 inches for poorly draining soil.
- Create a Leveling Pad. With pavers, a proper base is critical or they could settle unevenly or sink. Choose a paver base material or the equivalent of 3/4 inch minus with fines aggregate. First add a 2-inch layer in the bottom of excavation area, rake out and compact with a plate compactor. Repeat as necessary to reach finished patio height. The finished base (when compacted) should leave enough room above for the height of your paver stone and leveling sand. The final grade should slope away from the house, dropping 1/4-inch per foot.
- Leveling ("screeding") sand. Lay two 1-inch diameter pipes parallel on your compacted base, several feed apart. Spread 1 inch of paver sand between pipes. Level the sand by pulling a 2x4 board across the pipes several times until the sand is smooth (double check with Carpenter's level). Remove pipes and fill voids with sand, leveling with trowel. Repeat until entire area is covered with sand.
- Install pavers. Ask for assistance if you need it, as pavers and stones can be heavy. Start at a 90-degree corner nearest house. Along one side, moving away from house, place edge restraint on top of the base, removing sand if necessary. Fasten with spikes according to manufacturer's instructions. Lay a border course (the blocks used at the edge) along the sides. Continue, laying pavers in your desired pattern. If your desired pattern requires cutting of pavers, use circular or tub saw with diamond blade designed for that purpose. After all the stones are laid, do a final check to make sure they're all level.
- Install edge restraint. Place the edge restraint around the entire area on top of the base. Use a trowel to remove sand from edge of pavers. Push restraint tight next to pavers and install per manufacturer's instructions.
- Compaction. Compact the pavers with a plate compactor. Starting from the outside, begin with border edge and continue inward until you reach center. Repeat once more to set the pavers.
- Paver sand application. Spread paver sand over the surface and sweep into the joints. Compact once more to make sure all joints are sanded. Sweep away loose sand.
- Finishing. Backfill around edges and firmly compact dirt in the area outside of the edge restraint.
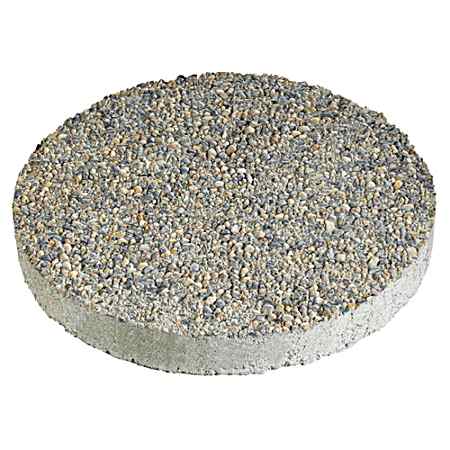
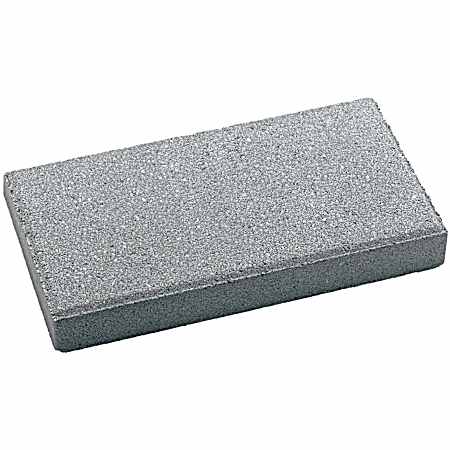
DIY patios using Patio Stones instead of Pavers:
Follow steps 1 and 2, except excavate 6 inches for well-drained soil and 8 inches for poor conditions.
Create leveling pad, using paver base in 2 inch increments and follow with plate compactor. Screed sand as described in Step 3 above. Lay stones in desired pattern starting at a 90- degree corner next to house and continue until area is covered. Place the edge restraints (step 6 above) around the entire project. Do NOT use a plate compactor on top of patio stones. Sweep paver sand into the joints until filled, then sweep away excess. Backfill the edges of patio area.
Care of Your Patio
To remove snow, use a plastic-bladed shovel and raised blades on a snow blower. Do not chop ice with sharp objects, or it may damage the stones. Regular sweeping or blowing of debris reduces surface staining and the chance of slipping on wet leaves or organic material. You can clean your patio with a hose, but avoid spraying water directly into the joints. In any season, if joints are open, sweep in more paver sand to re-fill. Check every few months for loose or damaged stones. If you need to level them, pull up uneven pavers, make sure the paver base depth is adequate and adjust is needed and re-compact base. Re-level the bed and reinstall pavers. A rubber mallet is helpful for gently tapping the stones back into place.